Tuesday, December 20, 2011

Healthy Breaded Shrimp

I'm back!

A few of you have been asking me why I haven't been blogging... well friends, school is why.  But on a happy note- I have a month of freedom from school!  So I plan to make a few posts in that time. (Beware: the middle of January I will most likely disappear again).

As you can probably tell from some of my previous posts, I love Gina's Skinny Recipes.  I try hers out more than anyone's and this post is from a recipe of hers (found here).


What you need:
  • 16 oz jumbo shrimp, peeled and deveined
  • salt and pepper to taste
  • 1 egg, whisked
  • 6 tbsp whole wheat Italian seasoned breadcrumbs
  • 2 tbsp panko
  • 2 tbsp grated Parmesan cheese
  • Cooking spray

Directions:

Preheat oven to 450°. Spray a baking sheet with cooking spray.

Put the egg in one bowl, and the breadcrumbs, panko and parmesan cheese in another.


Wash and dry the shrimp. Season shrimp with salt and pepper, then put a few at a time in the bowl with the egg to coat.


Put a few pieces of shrimp at a time into the breadcrumb mixture to coat, then on a baking sheet. Once all the shrimp is breaded, if you still have crumbs left, re-dip the shrimp back into the egg beaters and then back into crumbs and back onto the baking sheet.


Spray the top of the shrimp generously with baking spray then bake in the middle rack for about 6-7 minutes. Turn shrimp over then cook another 3 minutes or until cooked though. Remove from oven and serve right away with lemon wedges.


Friday, August 26, 2011

Key hooks with Mason Jar


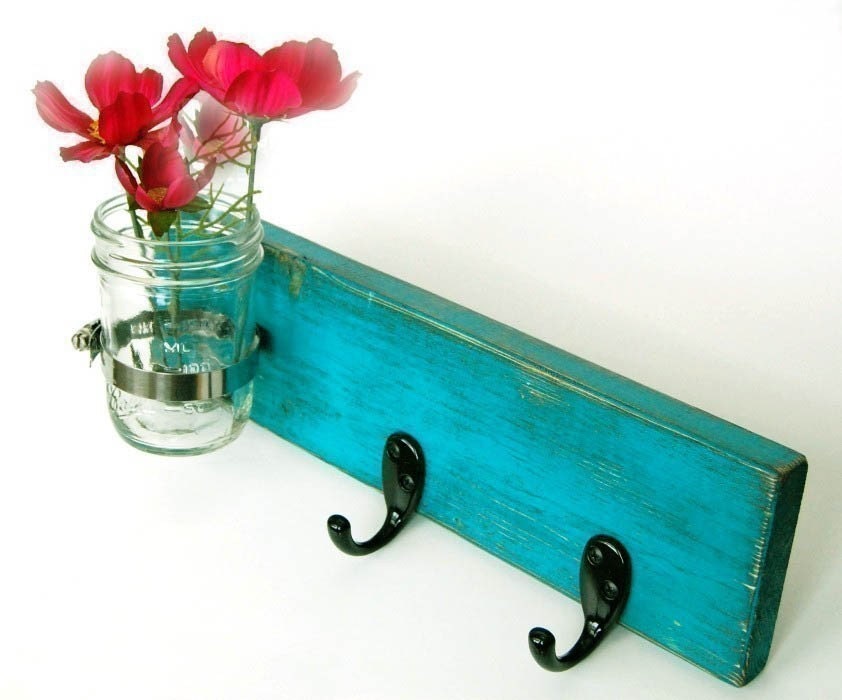
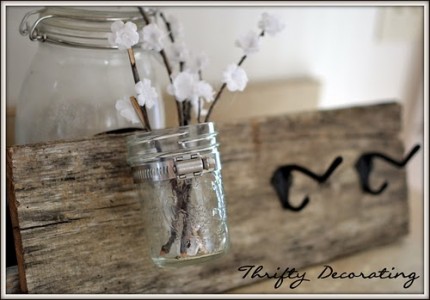
I've been seeing these key hooks with mason jars pop up around the internet lately and I decided I wanted to make one too.  

I really like the raw wood on this one, but I didn't have anything that looked that worn, so I made my own.  
Here's what I used:
A toolbox... or more-so the tools that were inside :)
Paint in a couple different colors
An old candle (or wax)
A pipe clamp
Key hooks
Sandpaper
Wood
Mason Jar
I also used a picture hanging kit to put brackets on the back of my board


What to do:
1. Rough up your board quite a bit (or to whatever degree you'd like).  I opened my toolbox and used whatever I could.  Pounding down on the side of screws, hammering in nails, applying pressure to the edges with a wrench, hammering areas of the board and even using new puppy teeth were some of my methods to distress the board.


2. Sand down any pieces of wood that are sticking up.
3. Paint the wood your base color.  I chose to use a mustard yellow.  This is the color that will peak through in small areas. 

 It doesn't have to be perfect, just make sure the wood is covered.
4. After the paint is dry, apply the wax to any areas you want to stay yellow.  I put it along the edges of the board, in areas that were distressed, and some random marks along the middle.  Later when you sand your board, the second coat of paint will peel right off the wax.
 
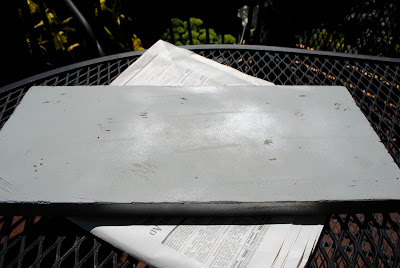
5. Paint the wood your top color next.  I used a spray paint to get more even coverage.
I don't use spray paint that often, but I DO know what "matte" means... and this was not it

SHINY! Not what I wanted.  

6. So I let it dry and scratched my head. Nope, it still wasn't a matte finish.  So I got some new paint and tried again. 
 I was actually glad there was this little screw up, because the new finish was matte, but a little bit of the shine from the previous paint came through giving it a cool look.

7. After the paint dries, take the sandpaper and gently sand the areas that you applied the wax. 
Here's what I got after sanding...


The nice thing about this blog is that I usually tell you what I do wrong and you can learn from my mistakes! I put the hanging hooks on after everything else was attached... and it was difficult!

8. Attach picture hanging hooks to the back of the board


9. Drill some holes in your board where you want your key hooks to go
 10. Unscrew the connector (technical terms, I know) on the pipe clamp.  Then either hammer or drill a hole on the back side that you will use to connect it to your board.  This was the hardest part for me, so good luck!
11.  Attach it to your board and then fit your jar into it and tighten (I did not do it this way, but I think it'd be much easier if I had!)

12. Drill your hooks into the board and you should have something that looks like this:


Monday, August 22, 2011

Hawaiian BBQ Chicken

THIS IS GOOD!

Just had to throw that out there :)  I love this recipe (if I can even call it that) because it's so simple and super tasty!

Here's what you need:
A crockpot
1 can of pineapple tidbits (drained)
Frozen chicken breasts (I used 4)
1 bottle of Archer Farm's Hawaiian Style BBQ Sauce (found at target)

I couldn't decide if this pic looked appetizing or just gross... you decide (remember it tastes so good!)


Mix it all together and cook on low for 4-6 hours or high for 2-3.  Once it's done, shred the chicken right in the crock pot.  
I had quite a bit of this so I tried it a variety of ways: over rice, on a bun, and in corn tortillas.  My favorite was the tortillas.  The sauce has a kick to it (which was nice, but I wasn't expecting!) If you're looking for a quick, good meal- MAKE THIS! 

Wednesday, August 10, 2011

Upcycled Necklace

I saw this necklace on J.Crew and thought it'd be super easy to make.  I was right!  I went to a thrift store and bought this 3-strand necklace (score! that means I could make 3 necklaces from 1!)

Then I headed to JoAnn and bought 3 different colors of ribbon (3/4-1 yd. works best)

 I got all this for $7.69 :)


Then I got to work separating the strands with a needle nosed pliers. Soon I got this...
Then I chose one of the strands and folded it over onto itself a few times 
Connect each end together so the multiple strands form one.  You can connect it with a link from the necklace or your own metal loop. 
Each end should look like this.  Then, I tried to make my own loop out of wire...
 It kind of worked... after I put the ribbon on I realized it didn't look so hot, so I re-did it with a metal loop like this one:

After you cut your ribbon, sear the ends with a flame. 
 Then tie on the ribbon ends to the loops you're using.

I did the same process with the next two strands.  Tada!